DIY Graduation Portrait at Home

A graduation picture holds a memory, a milestone, and a reminder of a chapter in our lives.  Due to the current situation, getting your graduation photo is not as easy as before.  Maybe you can try to do it on your own and at the comfort of your own home.


Here is a simple guide for your DIY graduation portrait
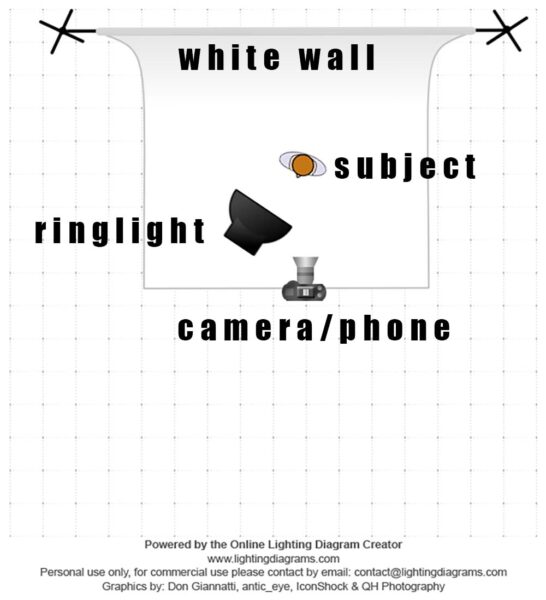
 

  1. Background
  • Look for a plain background (I.E. White wall, grey wall) and avoid strong patterns or clutter behind you.
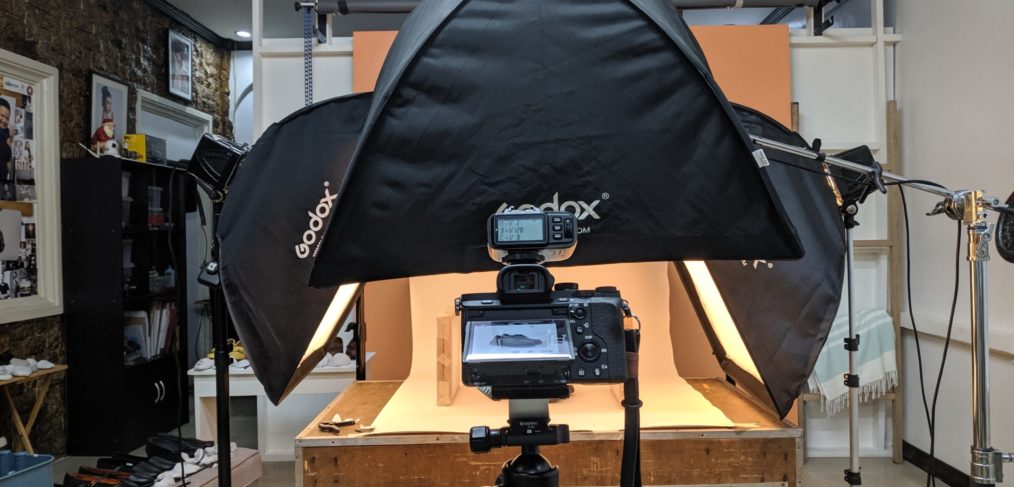
 

  1. Lighting
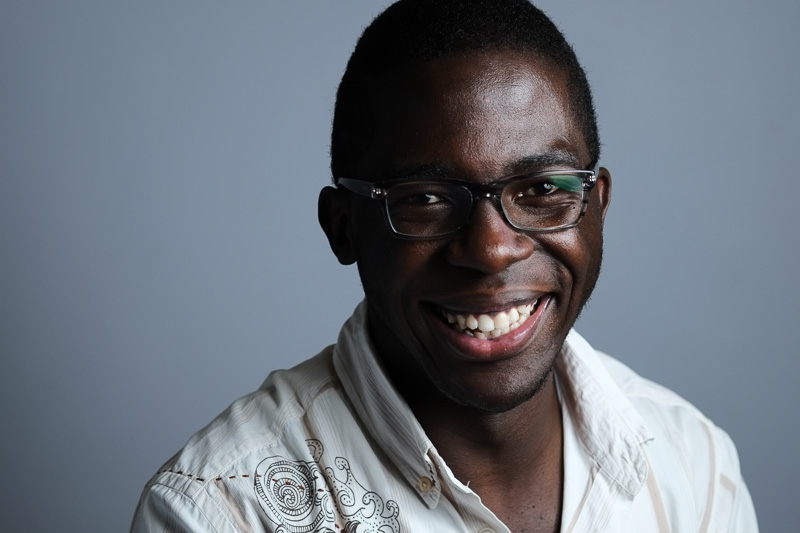
  • Face should be well-lit. Light may come from room light or window (natural light).
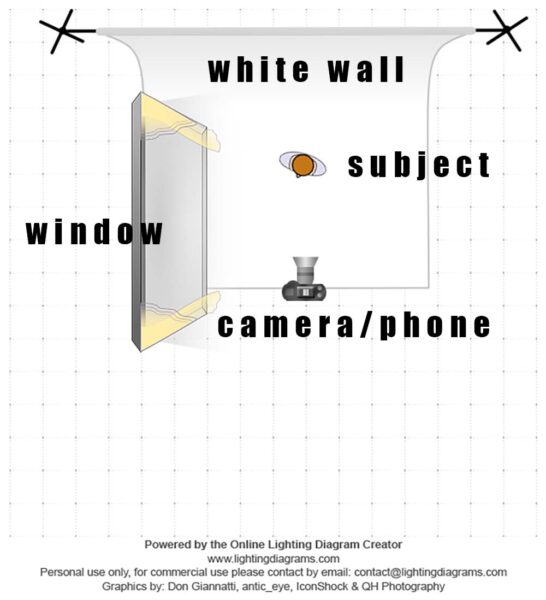
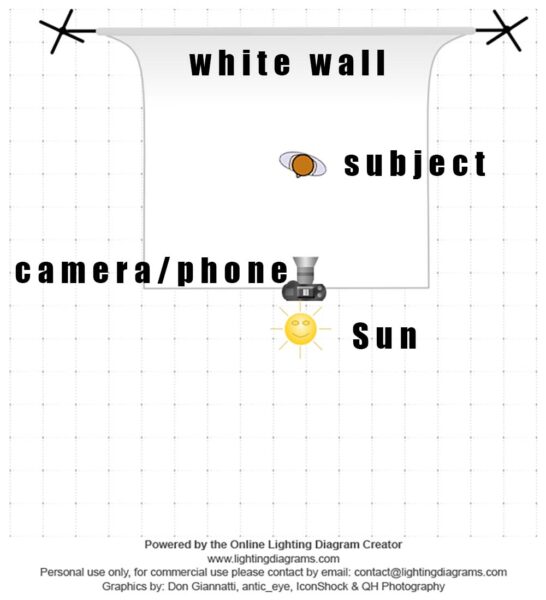
  • Do not stand directly under a light. Try to stand facing the light (as illustrated below).
  • Early morning and late afternoon are the best time to shoot using sunlight.


Window light


Sunlight


Ring light


  1. Camera
  • Camera height should be around chest level. Do not use your flash.
  • If you have a DSLR camera, it would be better. Set it to P mode then take a photo. If you have a kit lens, place the zoom at 55mm.
  • If you have a phone, it can also be nice. Just make sure to use the back camera. Hold the phone steady to make sure no shake and the image is sharp. Take a shot.  You should not be too close to the subject; camera phones tend to be on the wider side so move back a little and just crop the image to your preferred crop.
  • Remember that you must have enough light to make images look awesome. If you have a tripod, use it.


  1. Framing
  • Provide enough space on the side and above the head.


  1. Clothes
  • Clothes should be neatly pressed.
  • Make sure your top fits you well. A poor fitting top will be obvious in the photos (especially around the neck).


  1. General Grooming
  • Check for stray nose hairs – trim as needed.
  • Make-up should be clean and natural (Consult your school if make-up is allowed).
  • Avoid shimmers or products with lots of sparkle or shine.
  • Remove excess oil or shine by using a blotting paper (oil control film) or wash face prior to the shoot.
  • Keep your hair out of your face.


  1. Pose
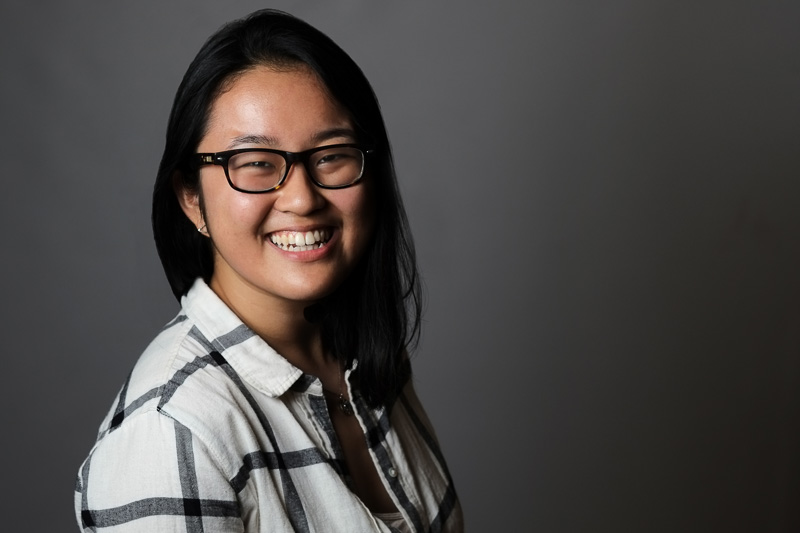
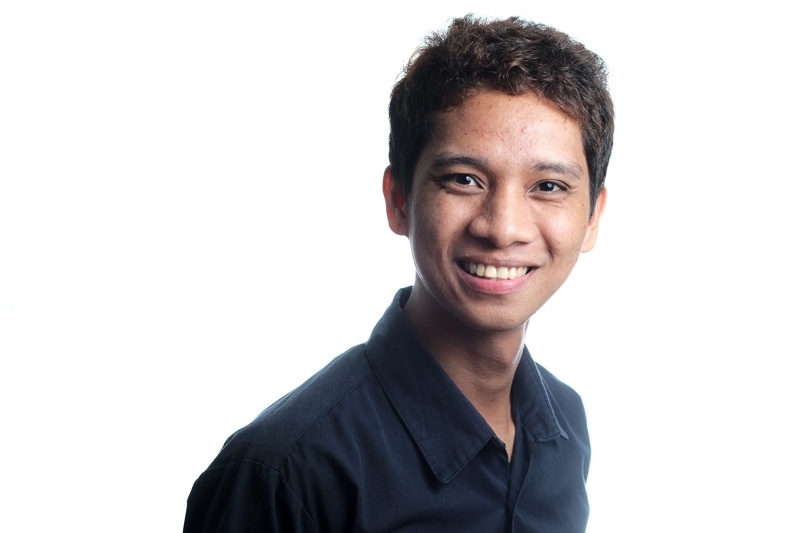
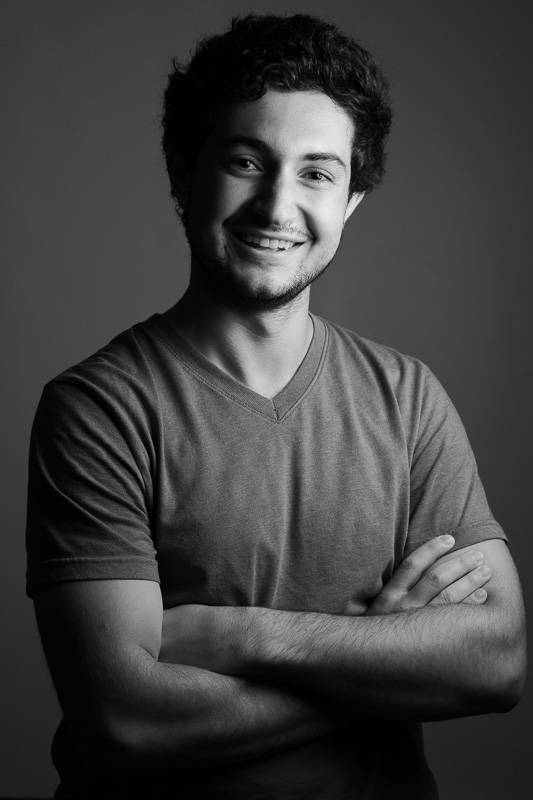
  • Upper part of your body is turned two-thirds away from the camera.
  • For women, half turn to the camera and lower a shoulder a bit.


  1. Face
  • Camera is your friend. Imagine that your talking to your friend; to make your expression look natural and relaxed.


Hope this guide can help you have a decent graduation picture.  Even if you use your mobile phone, digital cam, DSLR or mirrorless camera, what matters most is the emotion you captured in those photos. Stay healthy and safe to all!

How to Make your Products Sell Online- Using the Right Photos

A lot of small businesses nowadays are opting to sell their products online. People like it because of its convenience. Even I shop online these days too, and it seems online shopping is going to be the new norm during and after the Covid19 quarantine period.

So, have you tried it yet and took pictures of your products?

I’ll share with you a few things that can make your product photography awesome (and help you sell them too!) and perfect for your online shop.

Read More

If only cameras can talk…

All of us at some point blames the camera for missed shots. Our cameras have shutter lag, not sharp enough, slow AF, misfocused, noisy ISO, aperture not wide enough, not fullframe, and a lot of other stuff… What if our cameras can talk back to us?

Here are some stuff I think our cameras will tell us.

Read More

4 Simple Tips on Nailing a Portrait that Sells

All of us need a portrait. We use it on our social media accounts. We pick our “best picture”, best expressing the image or status we want to project to our peers, relatives, friends, etc.  Some use it for their professional sites such as LinkedIn, or corporate website. But do you think your portrait sells?

Read More

Horsepower.ph Corporate Shoot

About a couple of months ago, me and my friend Bob Cristuta, COO/Co-founder of Timebox Consulting, KroniklrPH and SlowMoManila, got a chance to talk to Diego Ramos, Co-founder of Horsepower.ph.  At that time, I was looking for new subjects to add to my portfolio.  Luckily, Diego allowed us to take some portraits for their team.  I started with one light and then added some more for the white background shots.  I used my Fujifilm X-pro1 for this shoot which was amazing as always. I had a nice conversation with each of the subject that made it easier to capture their best portrait. It was an amazing day of shoot with great people and an awesome company.

I think that every business should have great pictures not only for their products, but also for the team behind  the business.  It is always great to know who you are doing business with.  So it’s better to update the corporate portraits with a better one and drop those id pictures away.

By the way, Horsepower.ph is what we entrepreneurs, freelancers, and SMEs are waiting for.  Checkout their amazing website for more info and also checkout their team photos.  Click here for their site.

Here are some of the shots from our shoot.

Jojy Azurin - Co-Founder

Jojy Azurin – Co-Founder

Diego Jose Ramos - Co-Founder

Diego Jose Ramos – Co-Founder


Hannah Crisostomo - Co-Founder

Hannah Crisostomo – Co-Founder


The team of Horsepower.ph

The team of Horsepower.ph

a great candid moment captured during our shoot

a great candid moment captured during our shoot


And here are some BTS shots

HORSEPOWER_MONSTERSTUDIO-1-2

Shooting and having a nice conversation with Diego

Shooting and having a nice conversation with Diego

Self branding through photographs workshop at Watson Institute Philippines

Just browsing though photos in Lightroom and came across a set of photographs I took for Watson Institute Philippines. Watson Institute Philippines is an eight-week long accelerator in Manila, Philippines for student innovators, leaders, and entrepreneurs.  I met Andy Rapista, Co-founder of Watson Institute Philippines,  during one of the dinner organized by the Diego Ramos, awesome guy and co-founder of Horsepower.ph.  We talked about what Watson is and I also showed her some of my shots.  I was telling her that I coach my subjects so that they look their best in front of the camera. She asked me if I can do a workshop for the amazing students of Watson Institute.. I figured out my schedule and said yes. Glad I did the workshop for them.  It was an amazing experience for me and hopefully for them.  A decent portrait can improve your self confidence and maybe land more opportunities for you and your business.

I’ll just end this post with this line.

Everybody deserves to have a decent portrait.

Please checkout Watson Institute Philippines

Here are some of the photos I took after the workshop.


People.. Don’t look down!

I recently went for a vacation in Hong Kong with my wife.  I usually do portraits of people on the street.  I talk to them, ask some stuff about what they do then ask them if I can take a portrait of them.  It gives me more story to my images and learn more about the place.


HK_MONSTERSTUDIO-36

A small used stuff store in Central, Hongkong. He was really nice to let me take a photo of him.


I always observe random people when travelling and I noticed that a lot of them are looking down.. looking down at their mobile phones.  So I thought of shooting people on their mobile phone.

Looking for her partner

Looking for her partner

MTR Subway

MTR Subway

It became addictive for me.  I began shooting a lot of people on their mobile phones.  While browsing through my pictures, I saw photos that looks connected so I tried to combine them.

Why can't we talk

Why can’t we talk

Busy street at Causeway Bay

Busy street at Causeway Bay

Inside the train

Inside the train

Selfie!

Selfie!

Today, we are too attached to our mobile devices. Sometimes we just have to look infront of us, on our side, or above us to appreciate life.

I am glad that I took these photos.  Of course, I did took some other photos.  We just have to look around to find something interesting to shoot.

Taco Loco

Taco Loco

All photos are taken using my Fujifilm X100T which is the only camera I brought for this trip.  It is an amazing camera for candid photos. It is fast, silent and jpegs are great.  One thing I wish was a Fujifilm TCL-X100 for some closer shots.  The 23mm focal length can be too wide for some shots.  I also did minor adjustment in Lightroom for some of the photos.

Here are more photos.

Stuff about my Fujifilm X100T

Lately, I have been shooting a lot with my Fuji X100T.  After I got this camera, I started using it without reading the manual.  I just thought that it will be just like my Fuji X-Pro1.  I was wrong.

Here are some stuff I recently learned.

  1. Controls are different – buttons are placed differently than my Xpro1.  Almost all of the buttons can be assigned to your preference.. AWESOME!
  2. To enable Silent mode, you need to assign it first to the Q menu then you can turn it on and off there.  It is fine but I still prefer to just hold the disp/back button to enable it. It took me a couple of days to figure it out.
  3. Q menu can also be configured to your preference.  You can set it depending on your needs.  For me, i added the silent mode on it.

Fujifilm did an awesome job on giving us an option to adjust the button configuration depending on your shooting style.  I still have to figure out the best configuration for me.  As of now, all I did was assign the ISO button instead of video recording and adding the silent mode on the Q menu.  You just have to keep on shooting to understand more about your gear.